1 How to activate the link
- Download and install (as administrator) the latest version of IDEA StatiCa
- Make sure that you are using the supported version of Advance Design
- I necessary please install Microsoft Access Database Engine 2016 x64 version
After installation of both programs, run IDEA StatiCa and start with the item BIM. In the BIM wizard, continue with the item Activate your BIM Link... During the process notification "Run as administrator" appears. Please confirm with the button Yes.
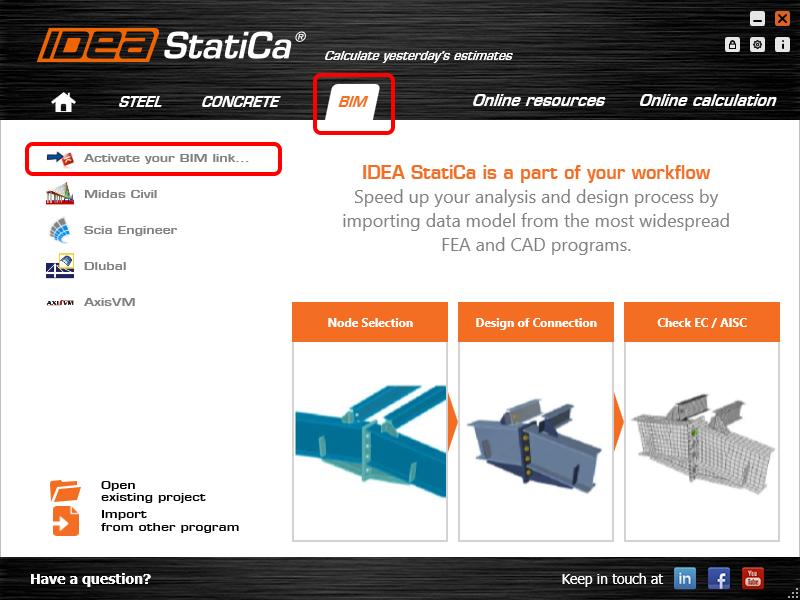
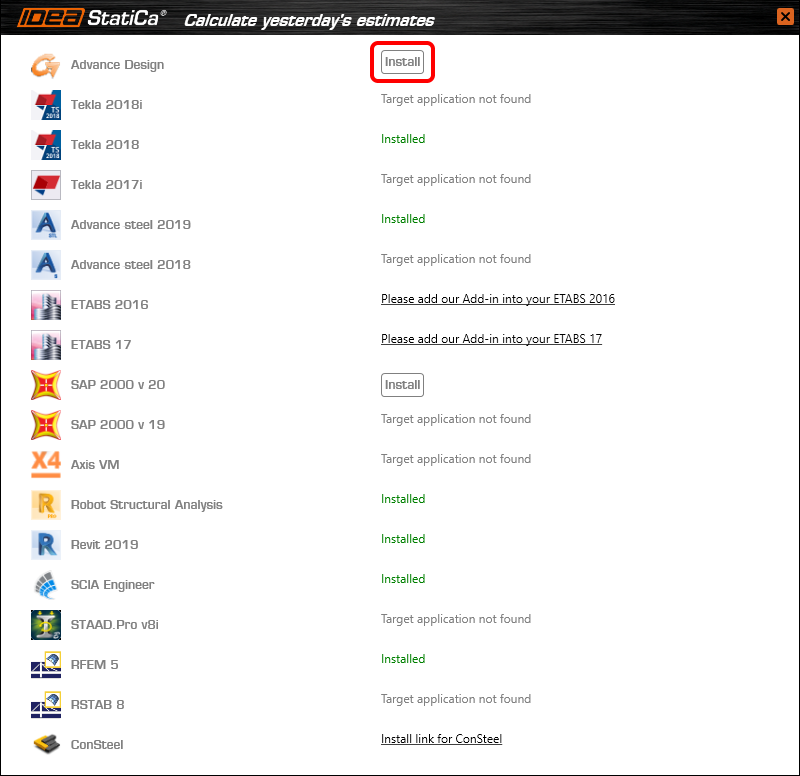
Select Advance design and click the button Install. The process of integration will start.
2 How to use the link
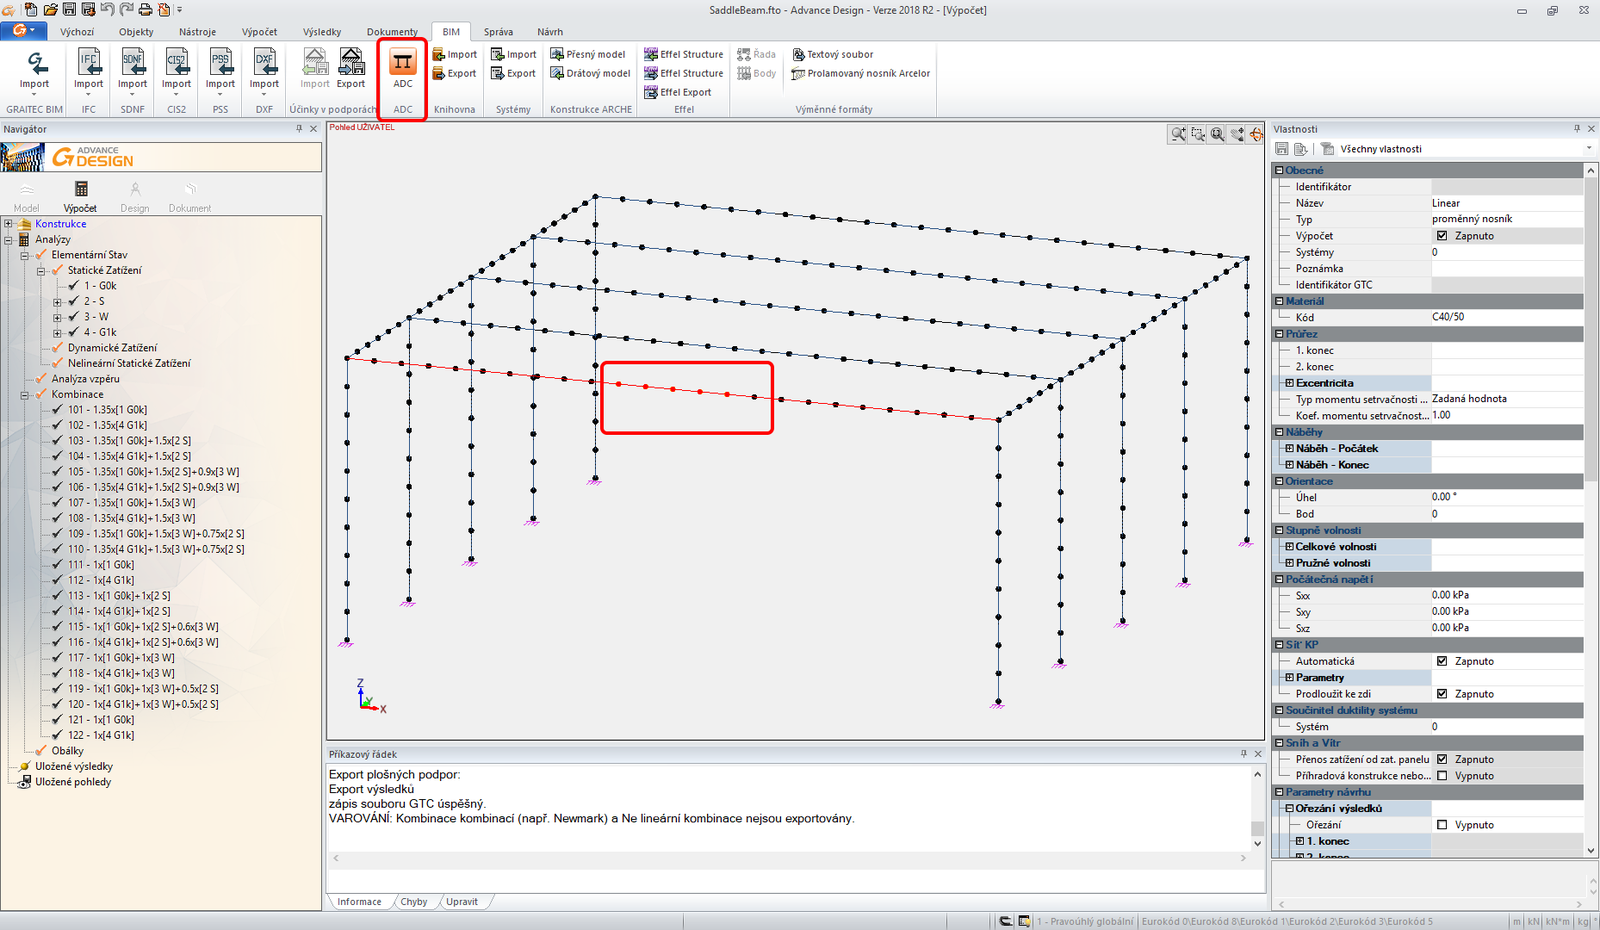
Open the attached project in Advance Design.

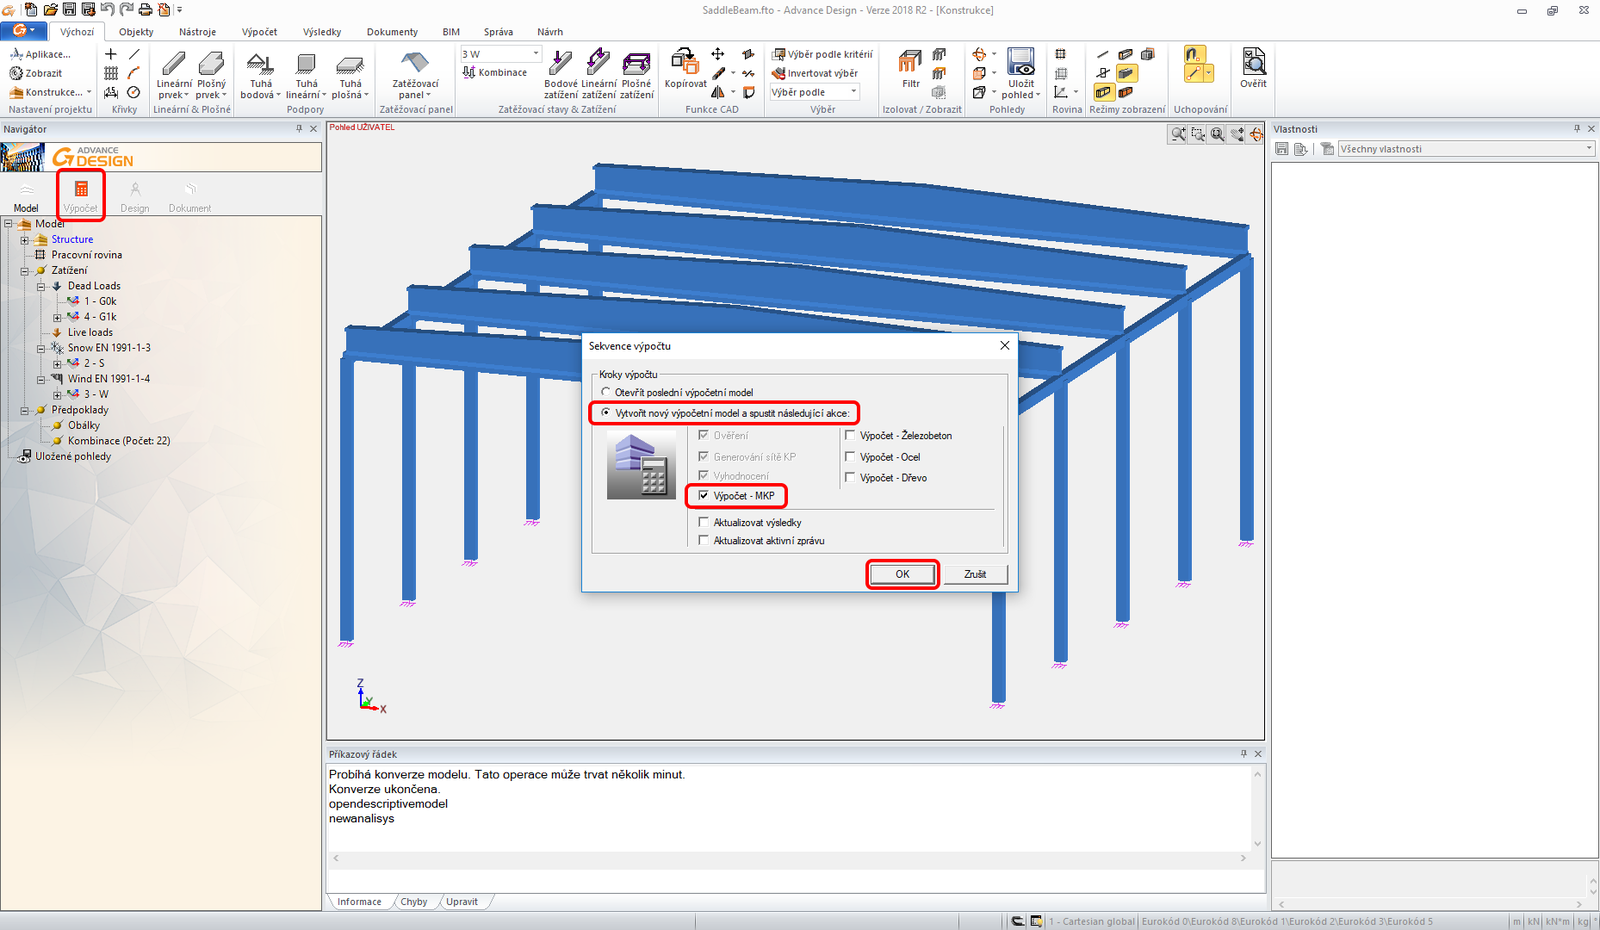
Run the FEM analysis.
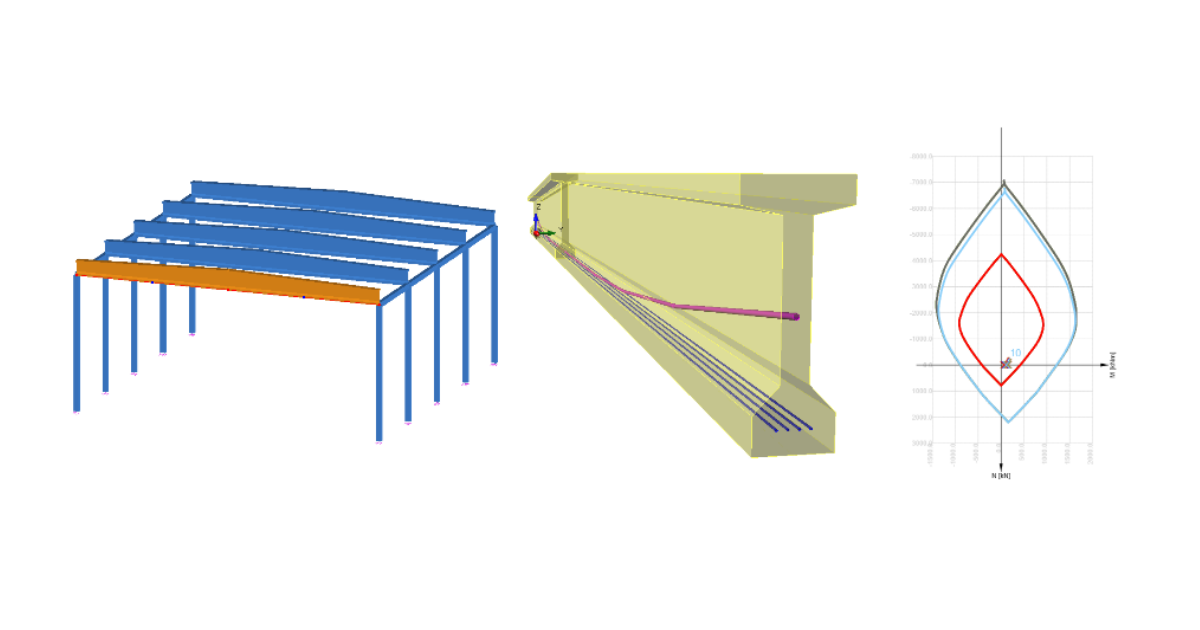
When the results appear, select the two-beam in the first row and export it by ADC command in the top ribbon.
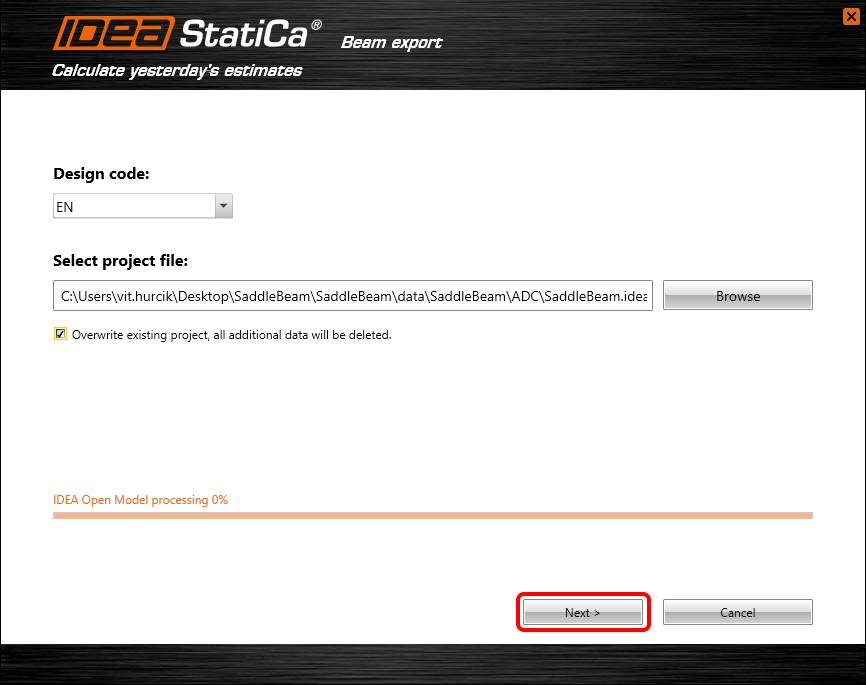
The import wizard automatically appears. Proceed with the Next.
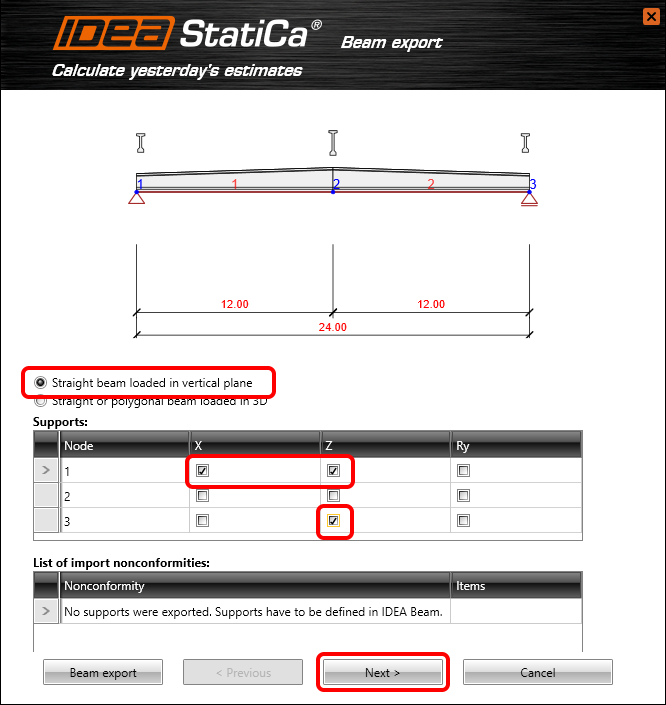
You will continue with the definition of the supports according to the picture below.
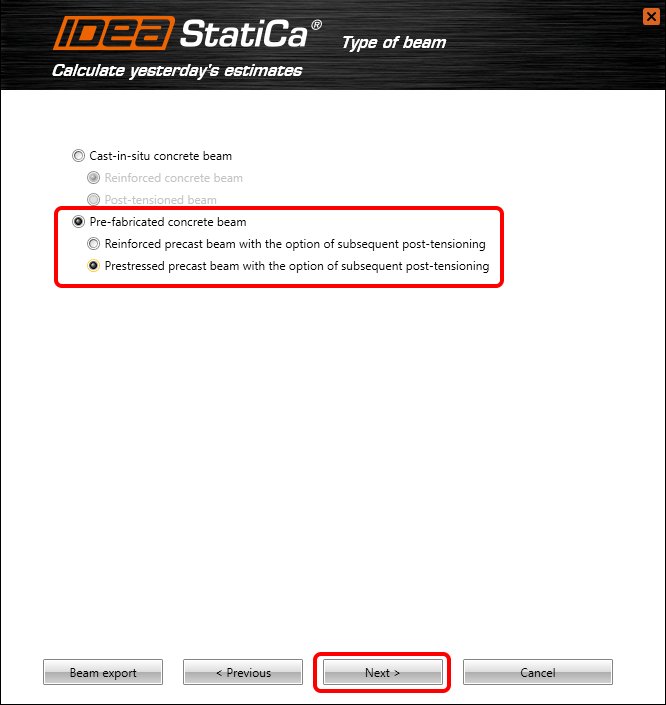
You change the type of beam to a Pre-tensioned pre-fabricated concrete beam with subsequent post-tensioning.
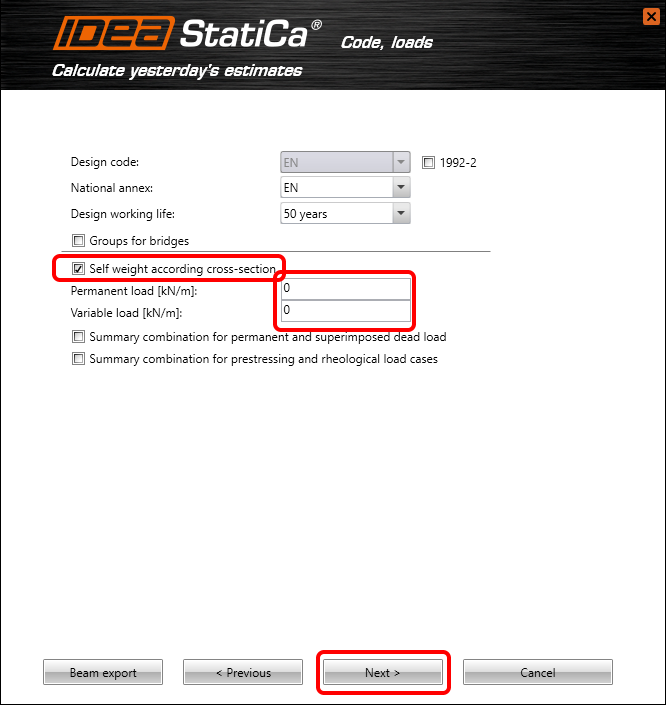
Let’s continue with the load's definition.
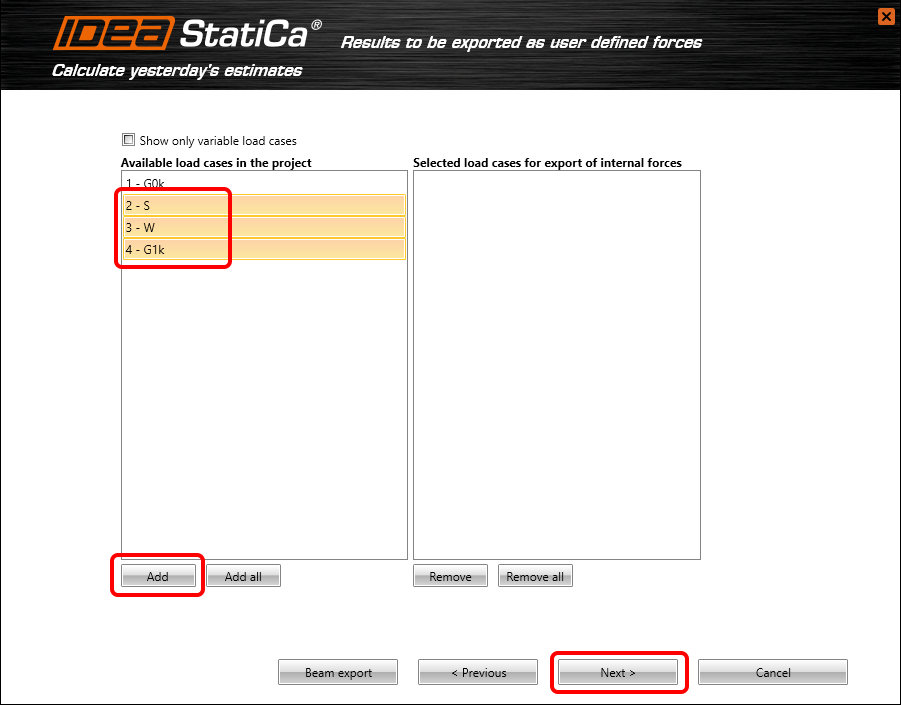
You have to select which results from the Advance design will be imported to IDEA StatiCa Beam. Follow the picture below.
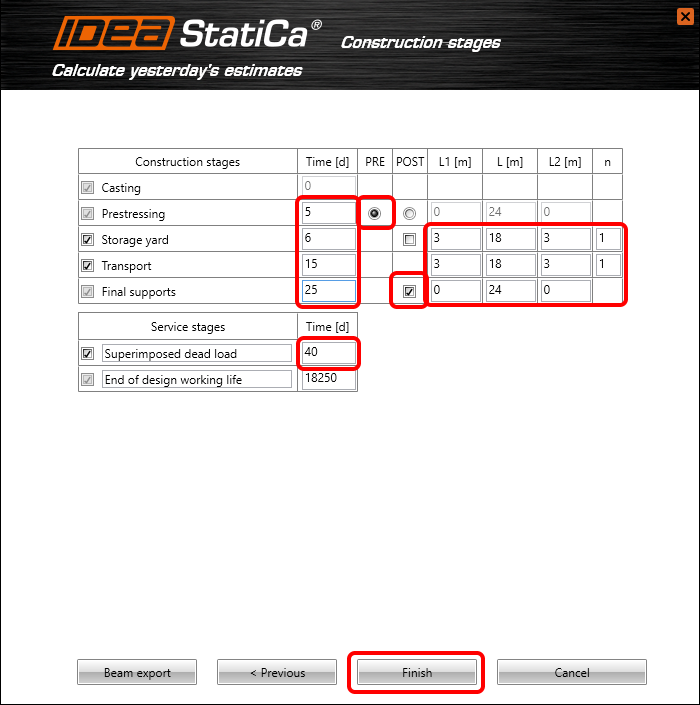
You have to pay attention to the right definition of Construction stages. Set the properties according to the picture below.
3 Design
Automatic data transfer is finished and IDEA StatiCa Beam with the generated project is launched.
In the first step, you have to change the properties of the Load cases.
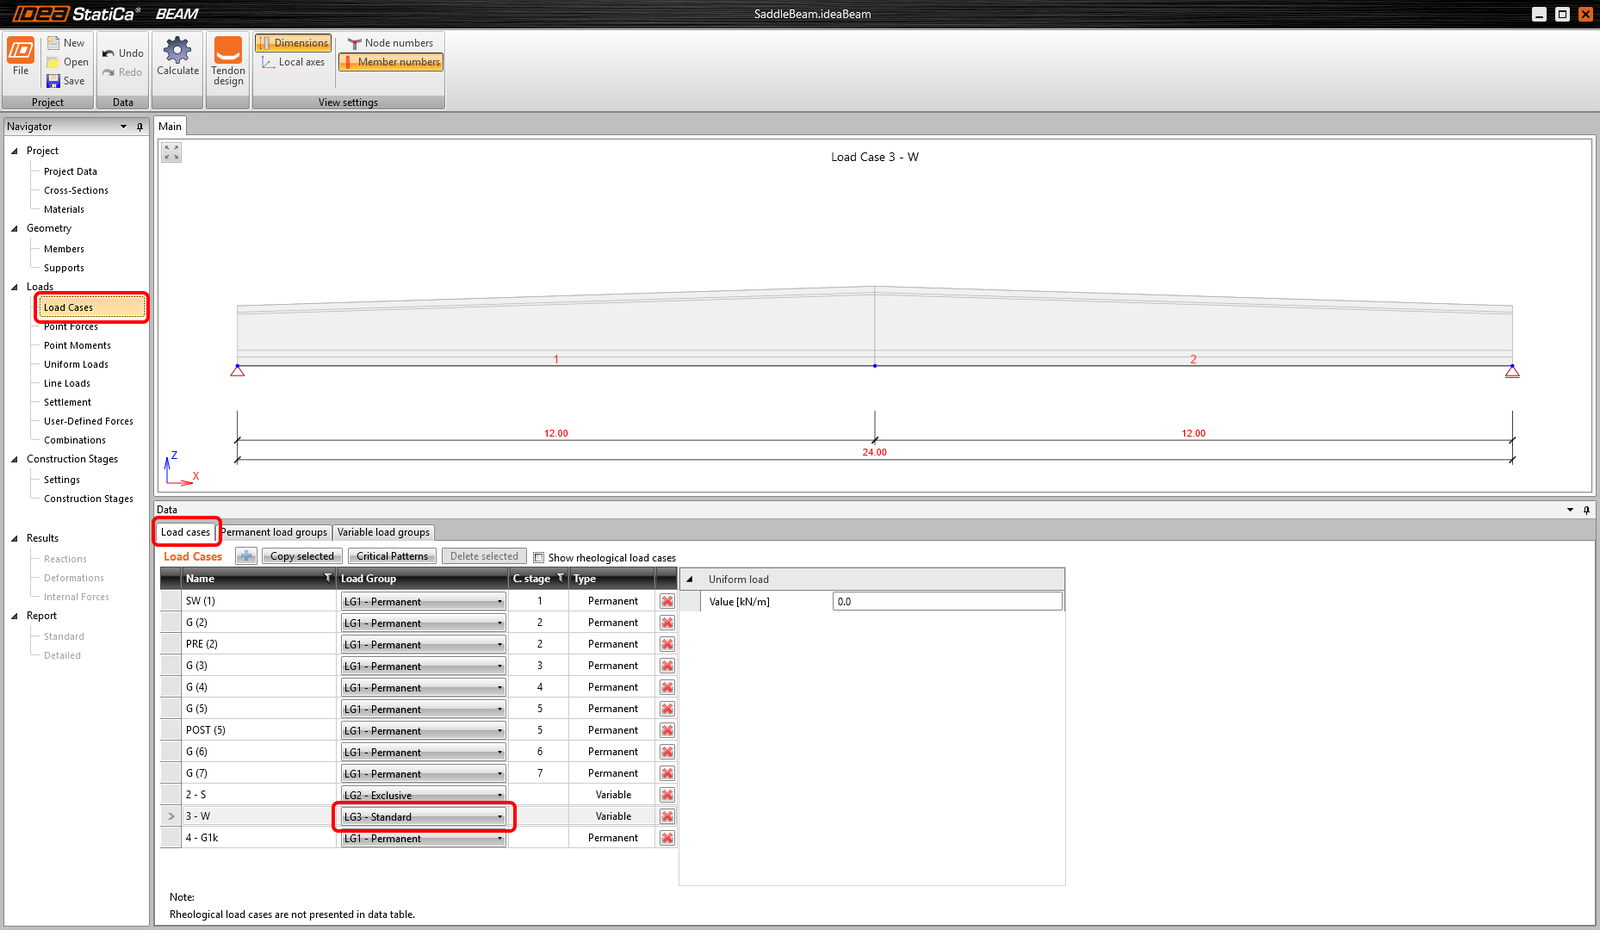
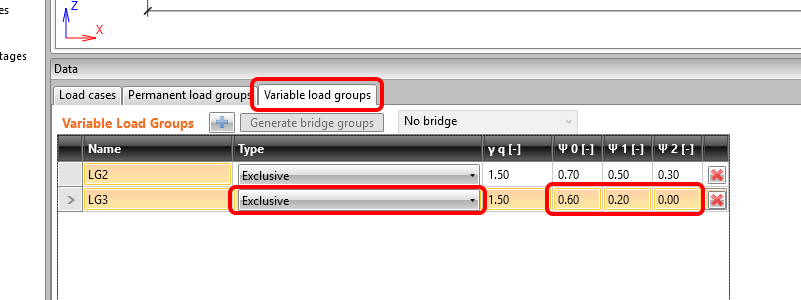
Let’s change the parameters for the Variable load groups also.
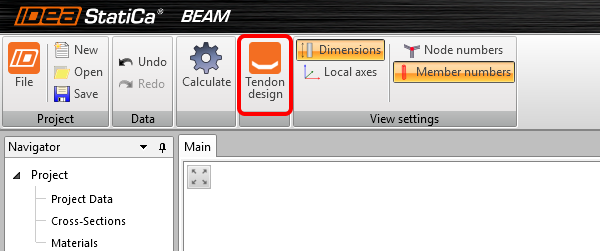
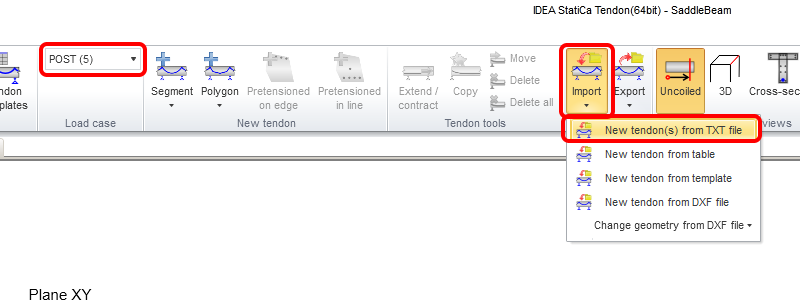
You can proceed to the Tendon designer by the command in the top ribbon.
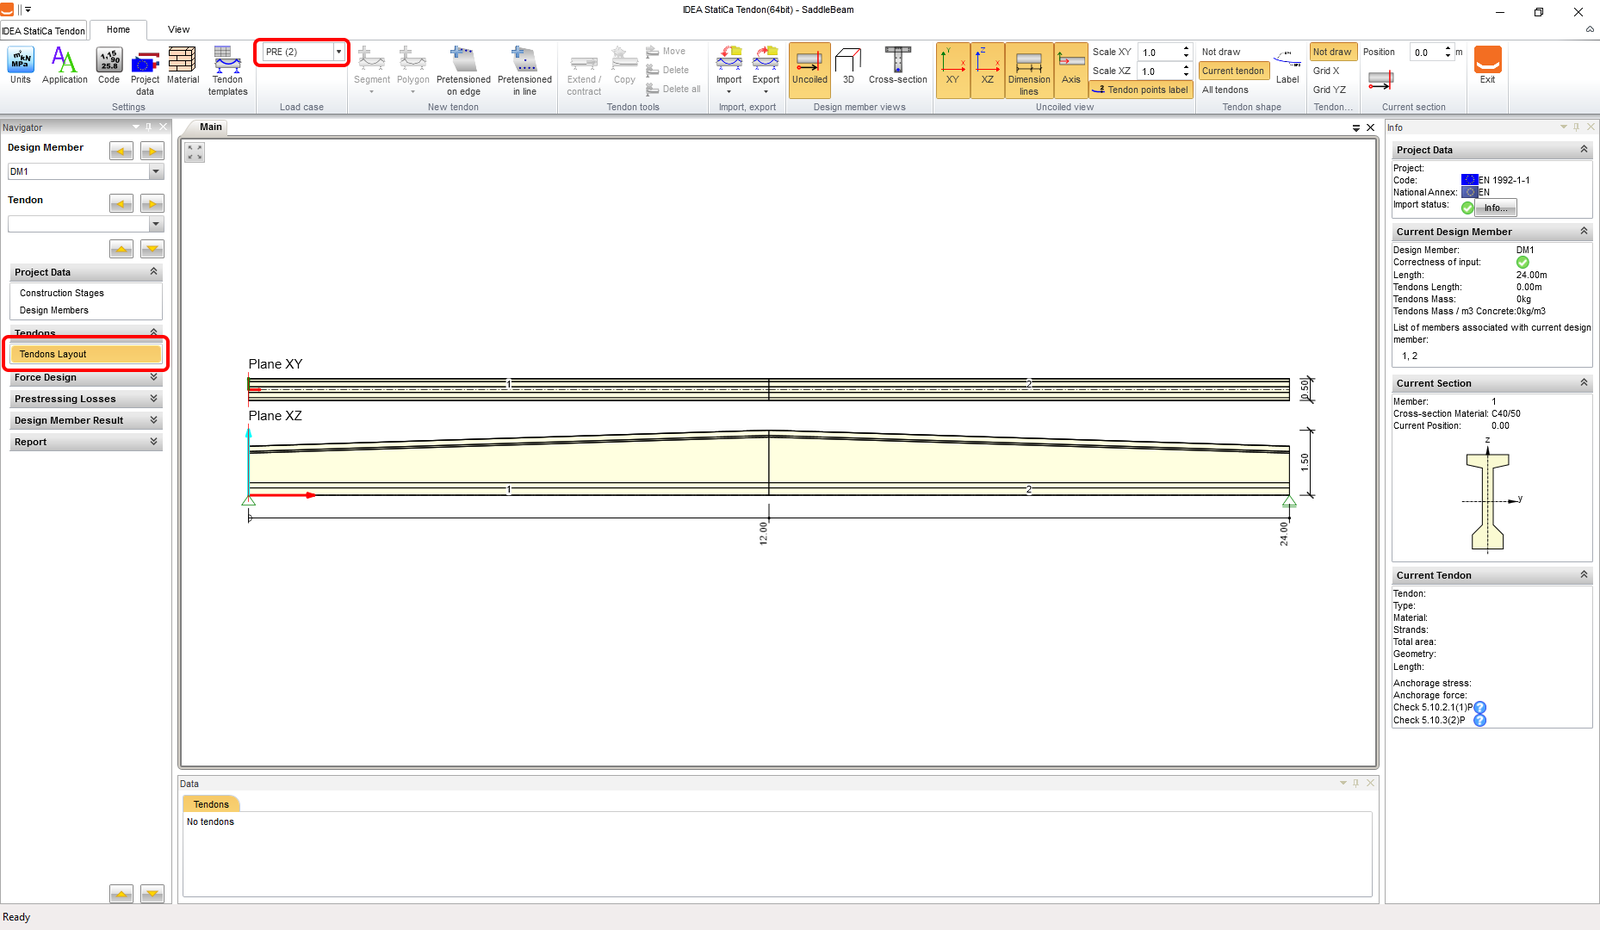
Let’s select the Tendons Layout and start defining tendons. You have to pay attention to which Load case you define the tendons.
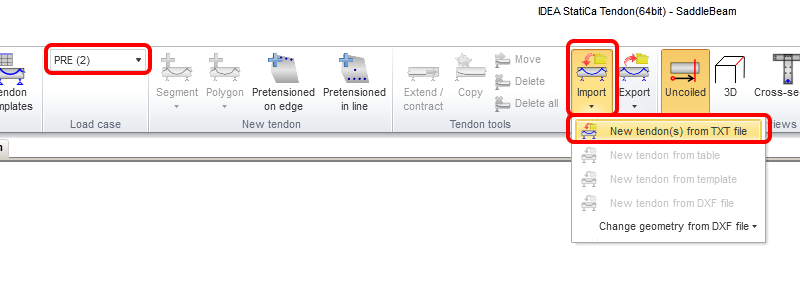
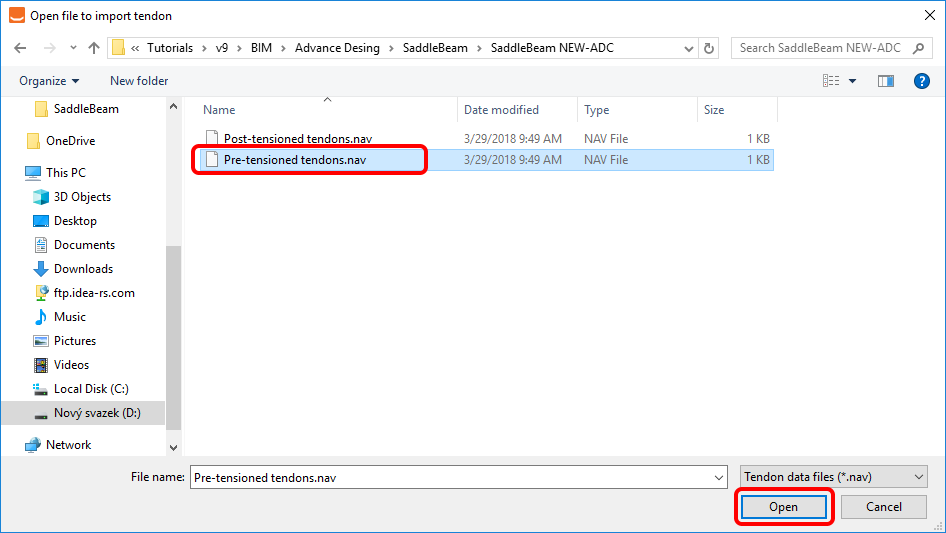
Now you can import the tendons from TXT file.
Import the Pre-tensioned tendons.nav template. You can find it in the source files of the tutorial web page.
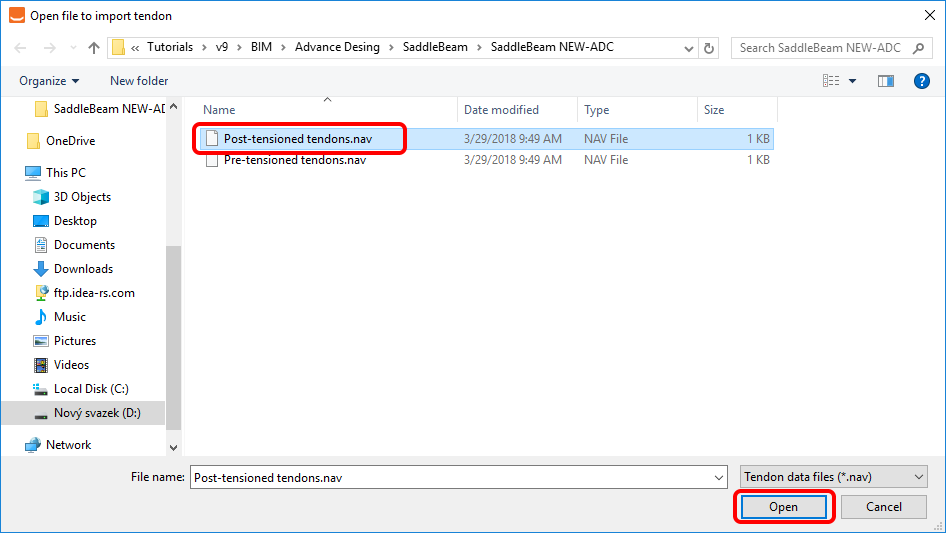
Let’s do the same thing with the Post-tensioned tendons.
The right template is the Post-tensioned tendons.nav.
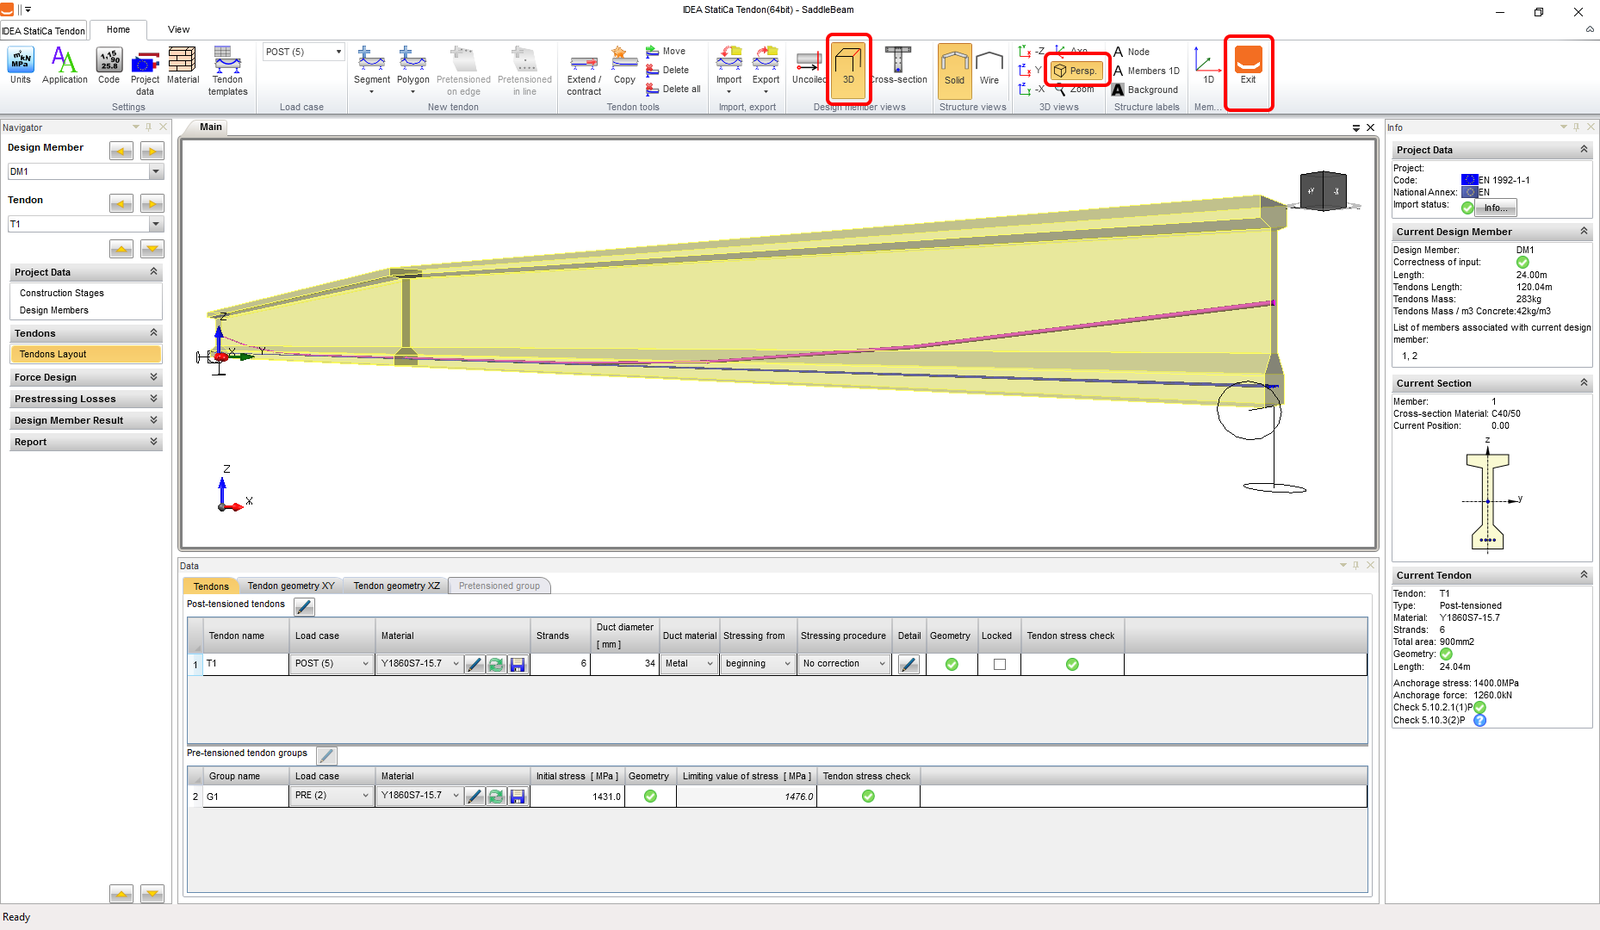
You have to adjust the details of the Post-tensioned tendons group T1 by the Pen icon. Let’s set different anchorage stress. Follow the picture below.
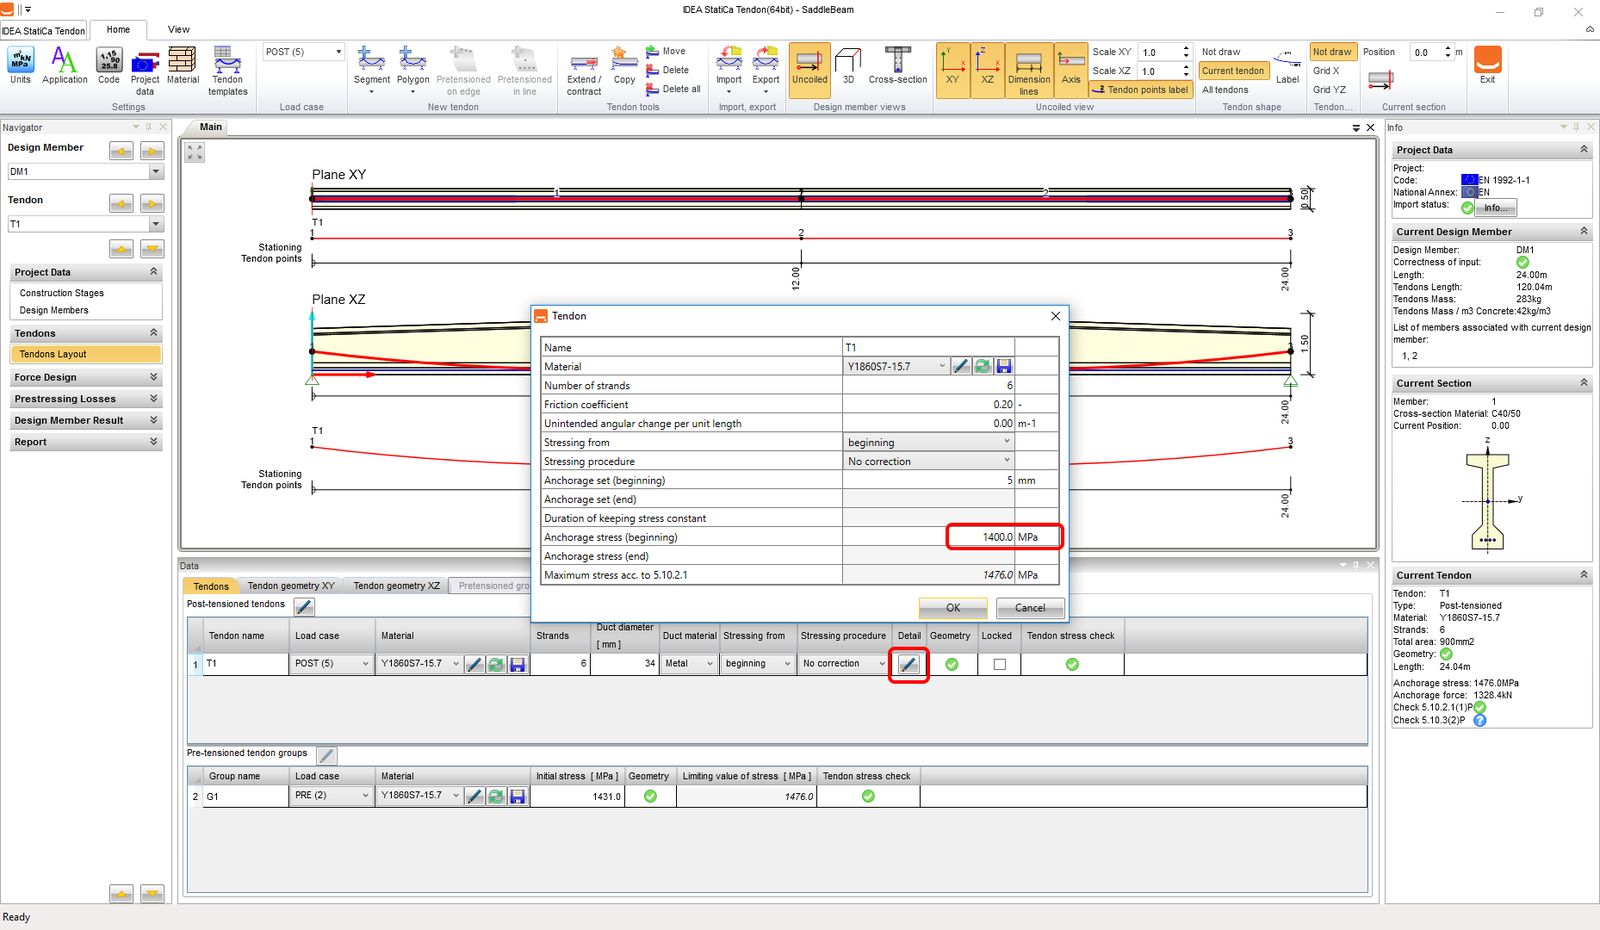
You can check the defined tendons in the 3D view. After that, exit the Tendon designer.
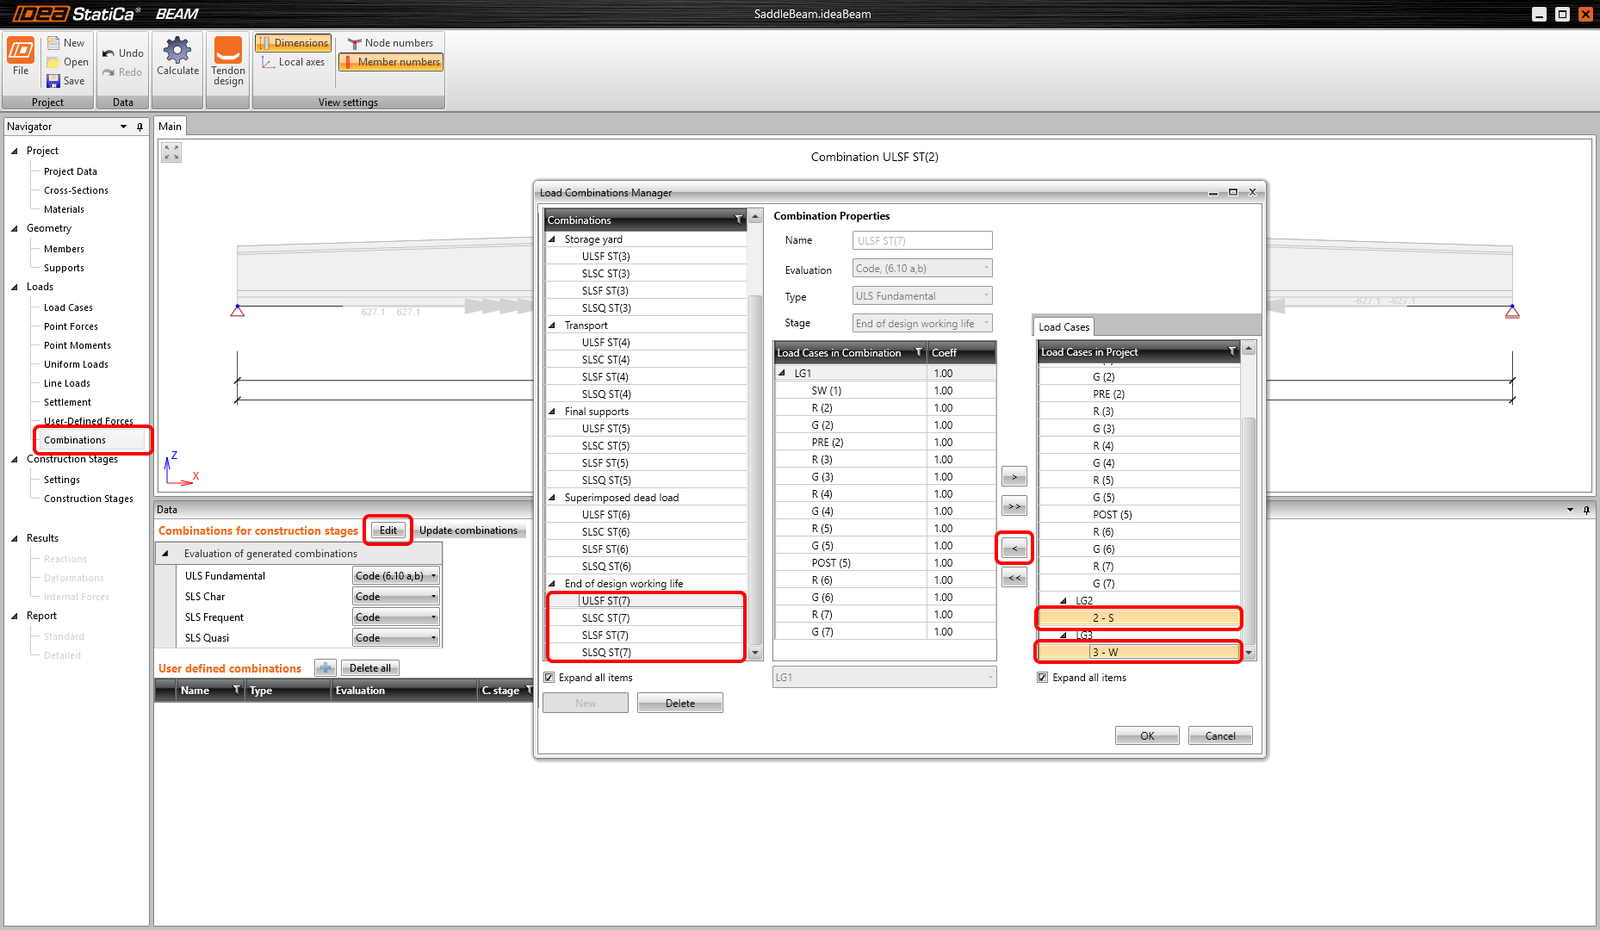
You can proceed with the change of the combinations. You have to add the load cases 2-S and 3-W to all combinations for the End of design working life.
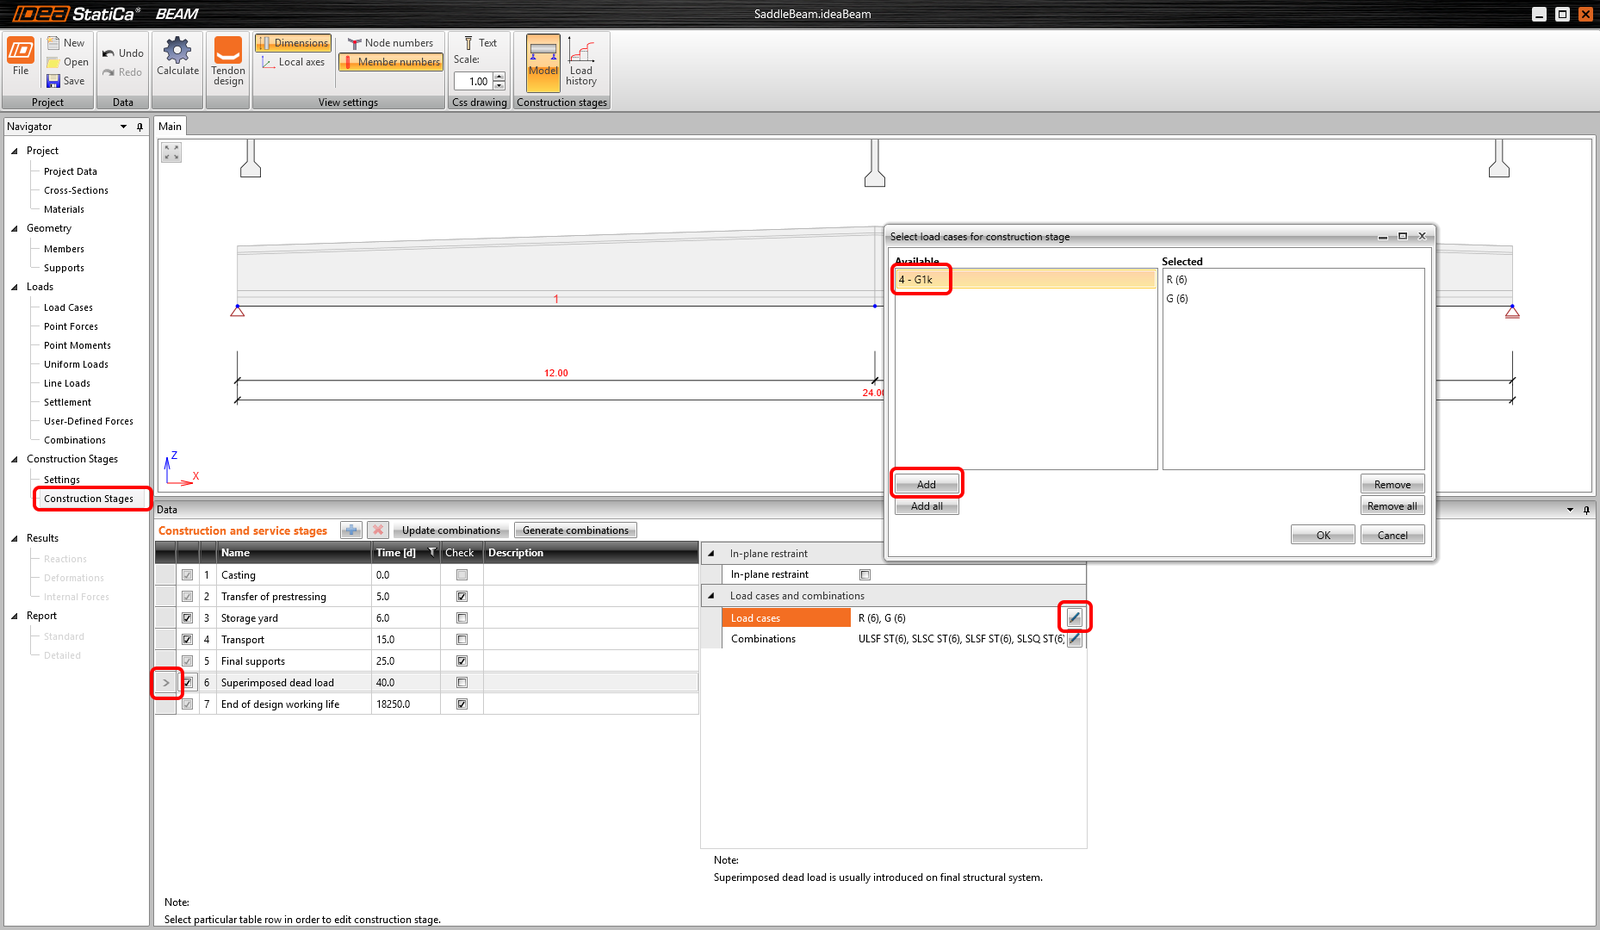
Now you have to adjust the Construction stages. Let’ add the G1k imported load case to the 6th construction stage Superimposed dead load.
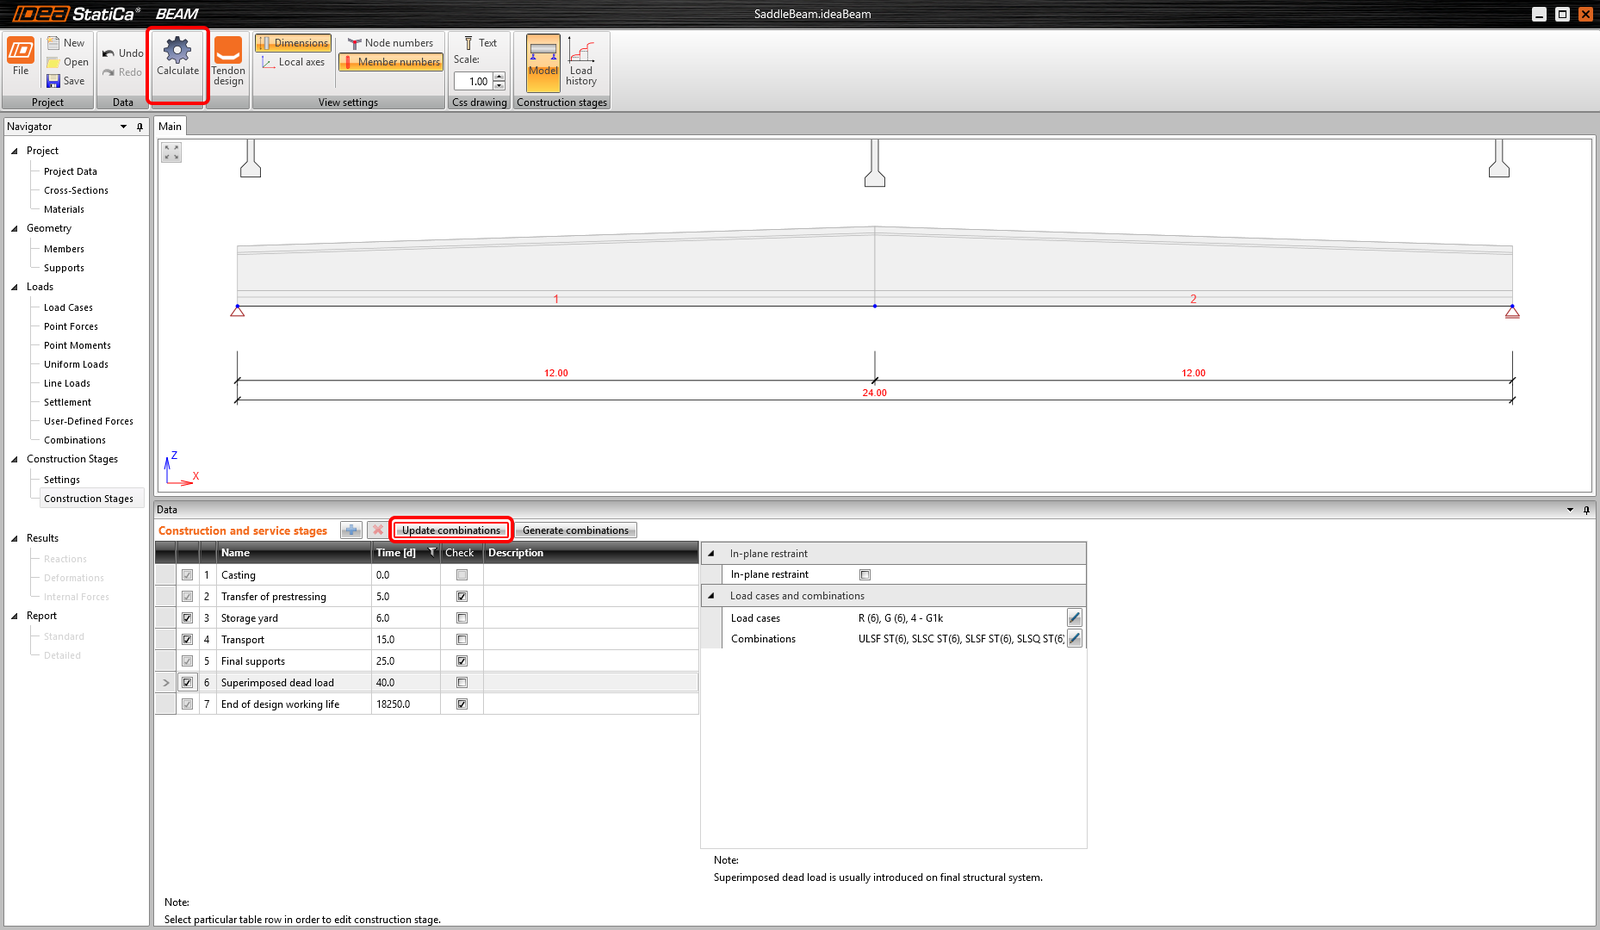
Now let’s use the quick automatic Update combinations command and then Calculate the project at the top ribbon.
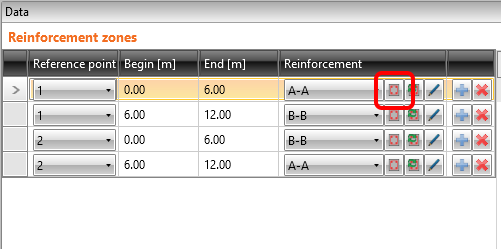
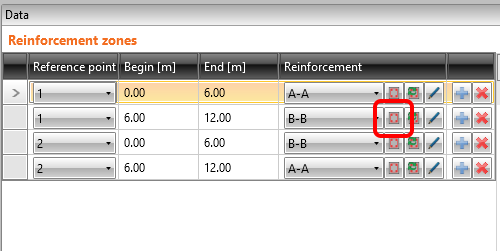
You can define the reinforcement for the beam now. Let’s define Zone templates as two along the length of the beam. Finally, the adjustment of the Check positions has to be done.

You can define the reinforcement itself for the A-A zone.
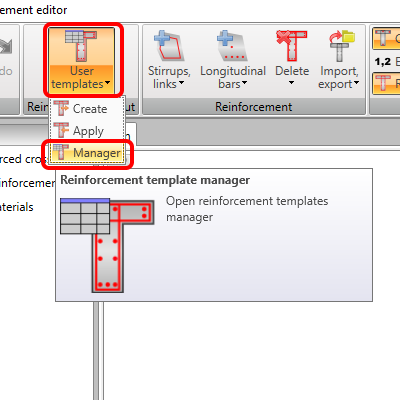
After the Reinforcement editor is opened you have to open the Reinforcement template manager.
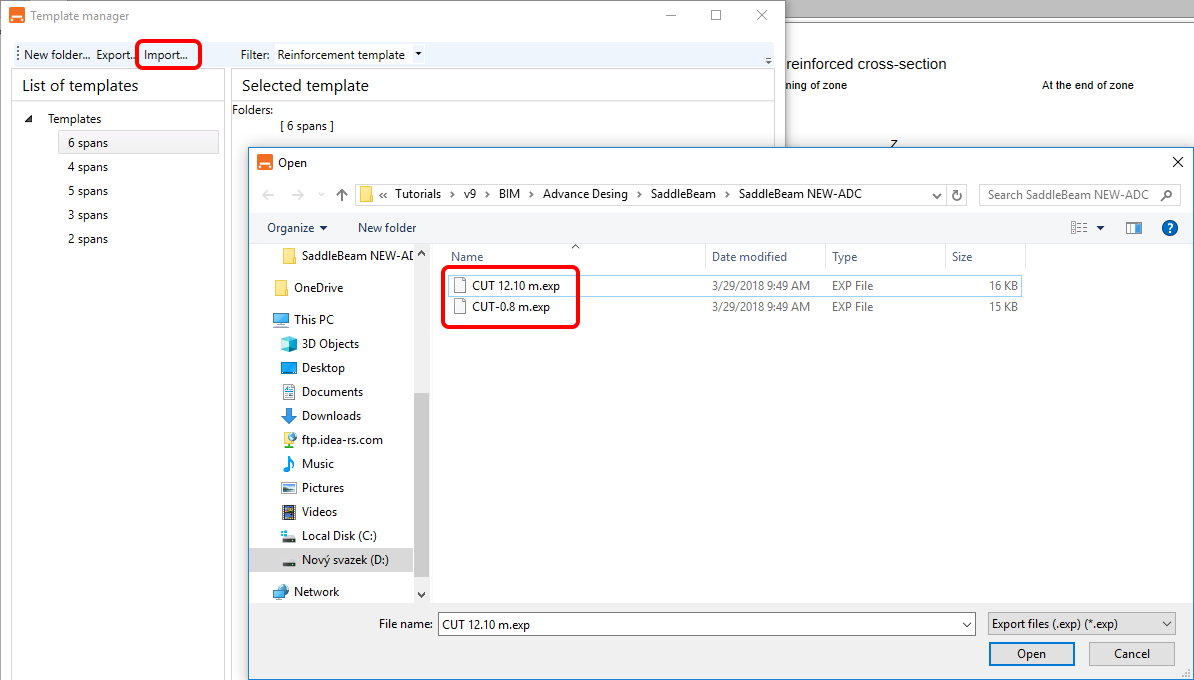
After that, you need to import the two templates for the reinforcement. You can find it in the source files of the tutorial.
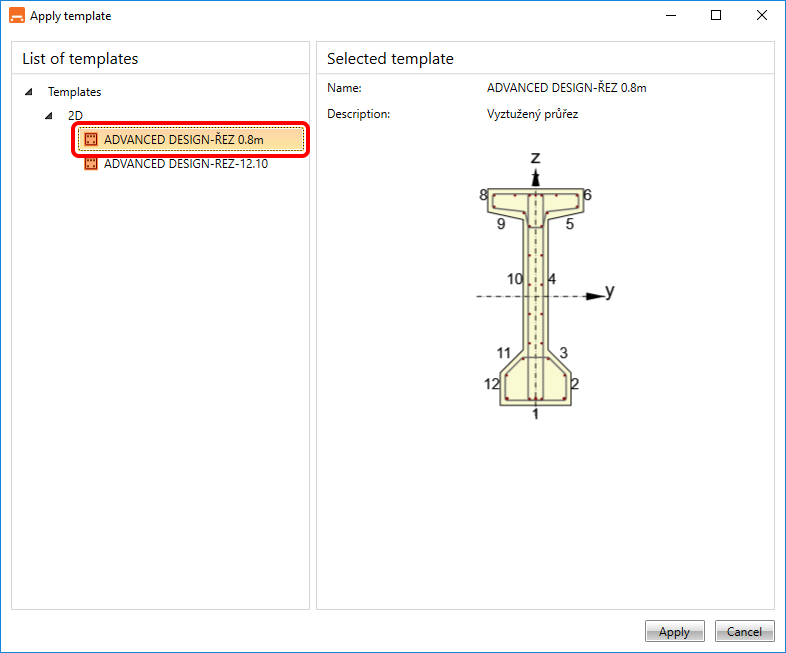
In the Reinforcement editor again, you Apply the template.
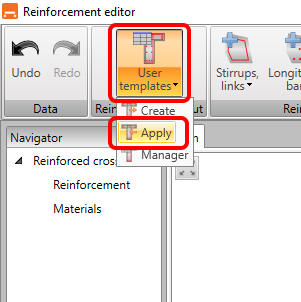
Let’s choose the template Advance Design-Rez 0.8m.
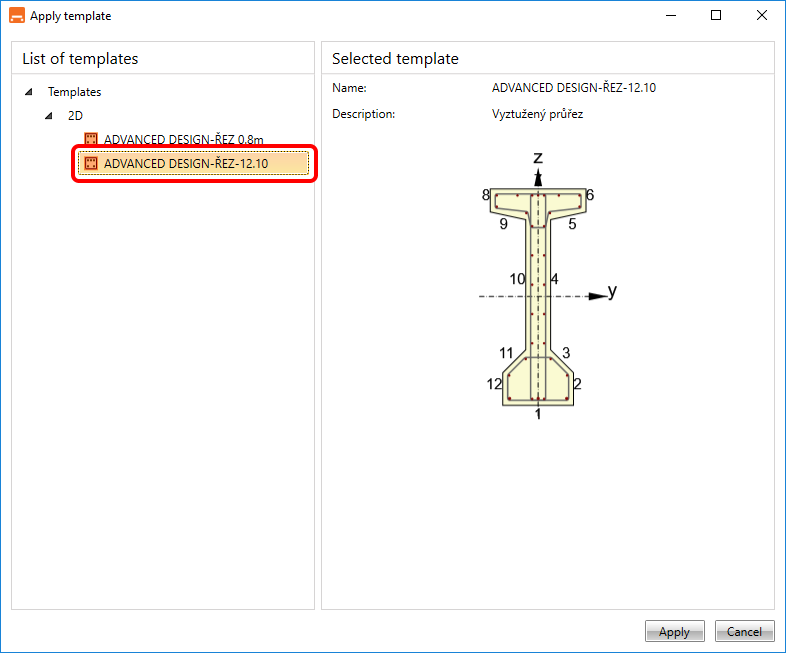
You created the reinforcement for the A-A zone. Let’s do the same thing for the B-B zone.
Let’s choose the template Advance Design-Rez 12.10m.
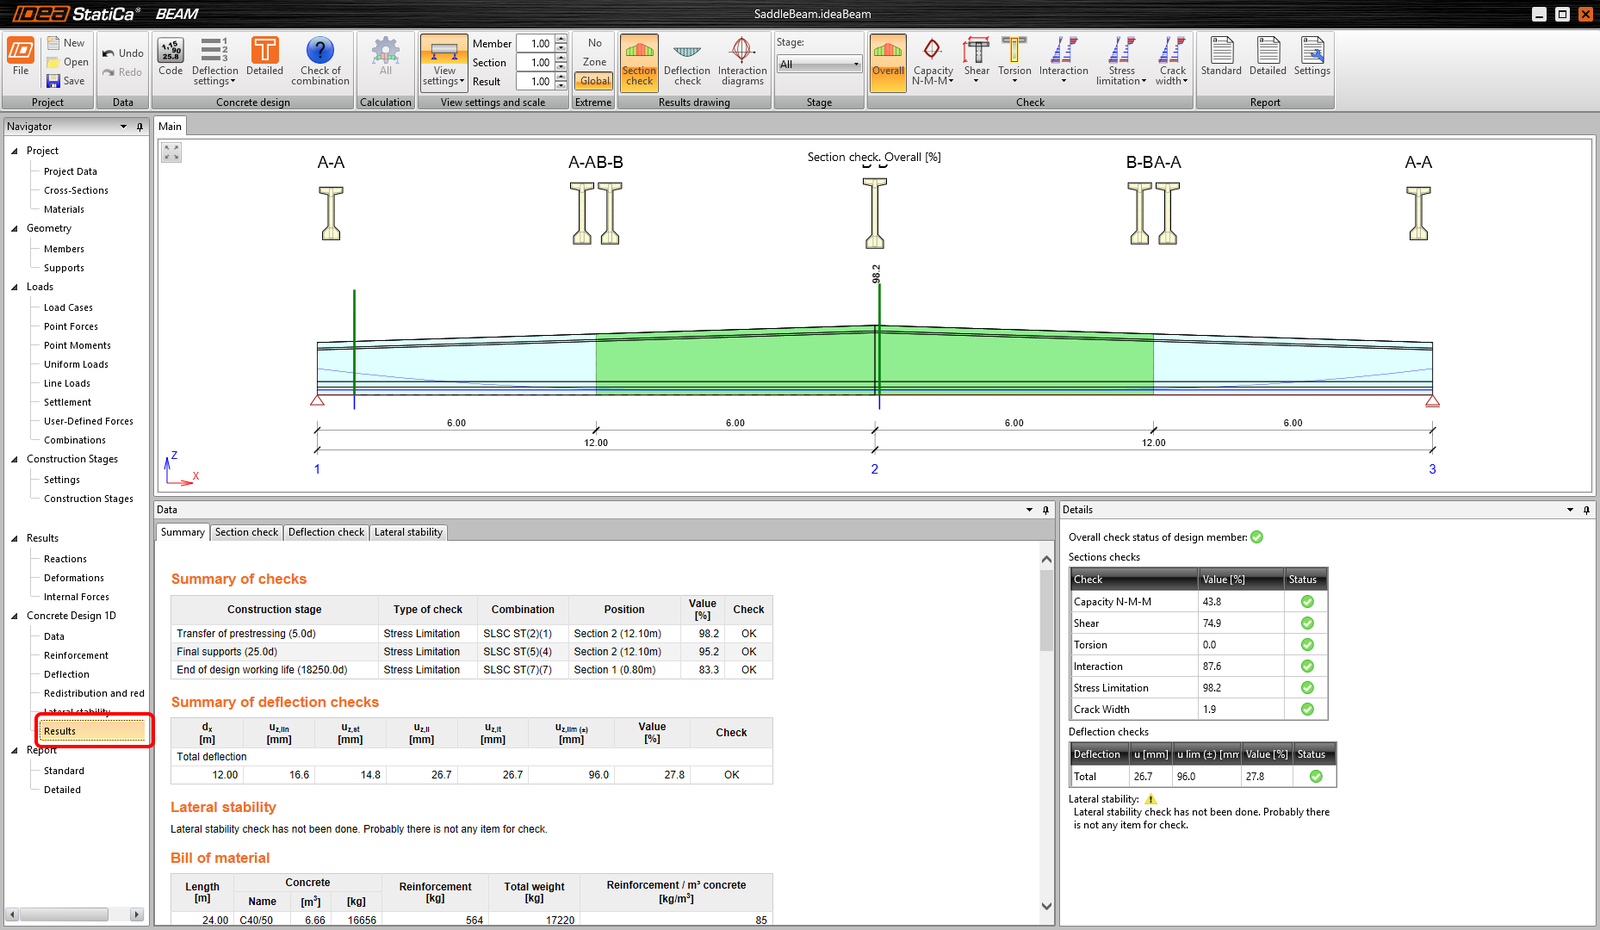
5 Check
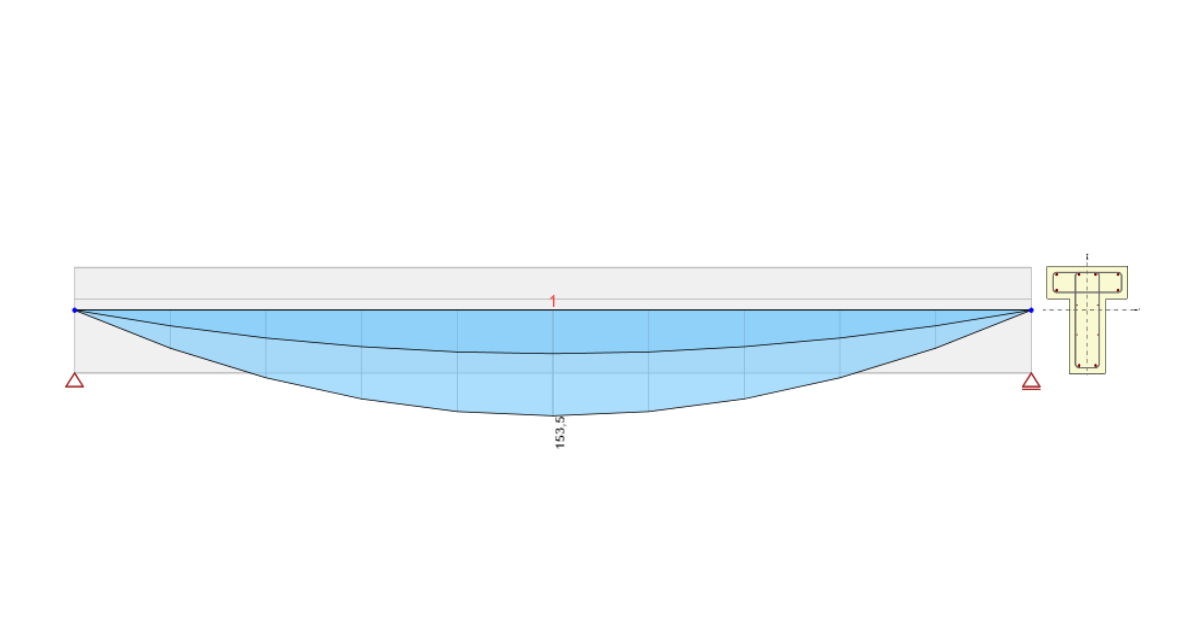
You proceed to the Results tab and the analysis is automatically started. The results are provided after the calculation.
6 Report
At last, go to the tab Detailed Report. IDEA StatiCa offers a fully customizable report to print out or save in an editable format.
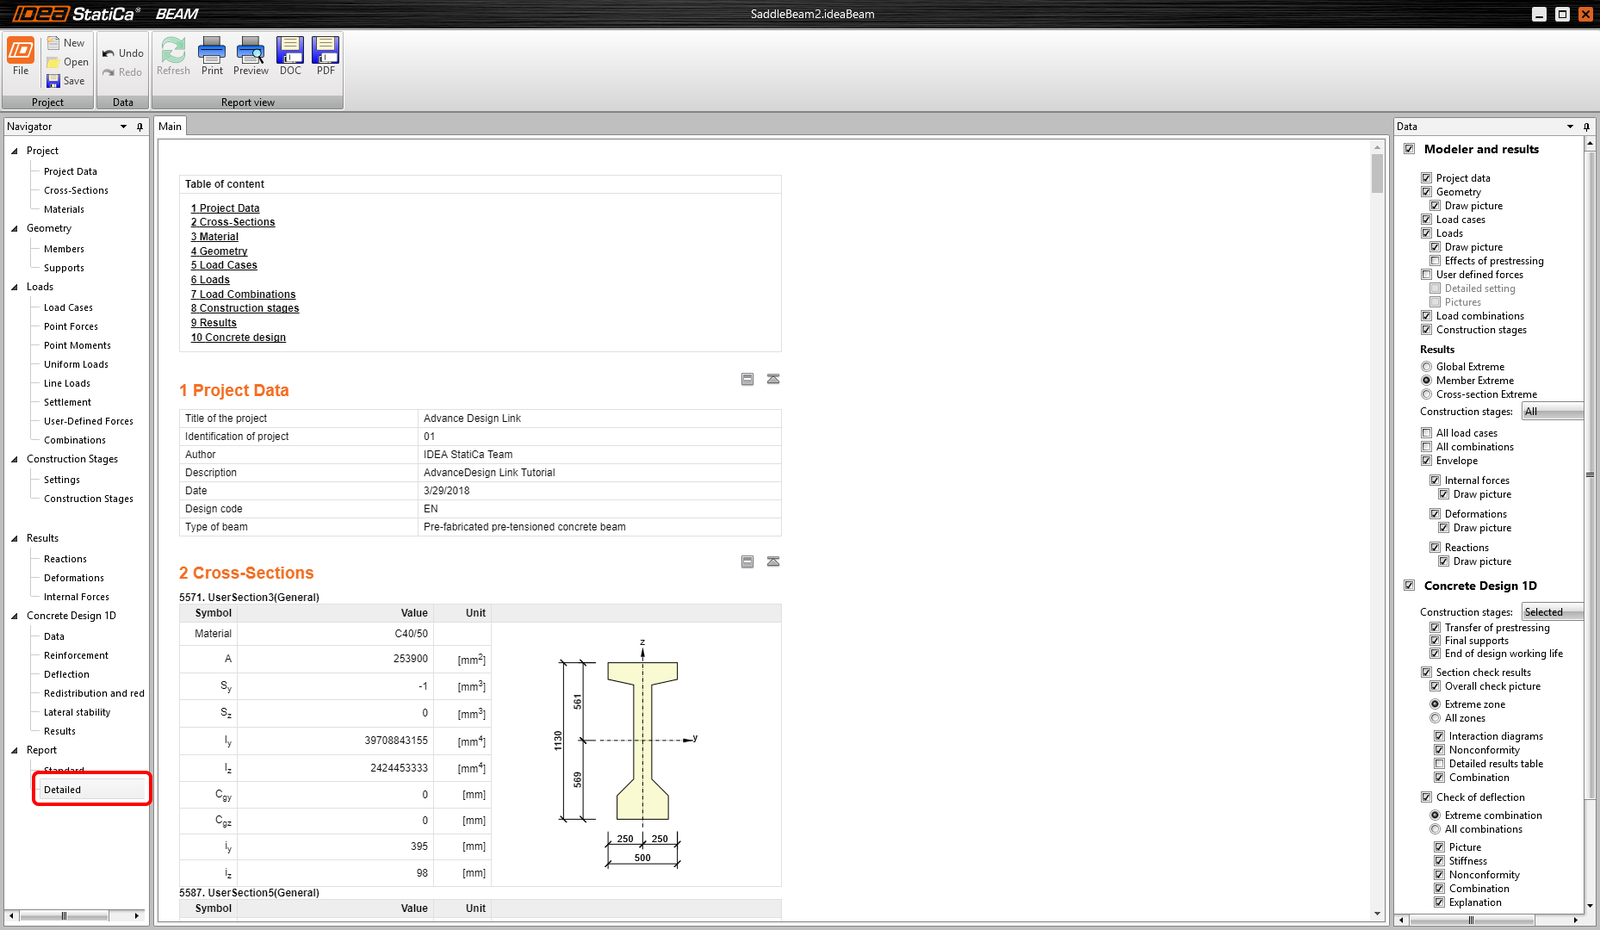
You have designed, reinforced and code-checked Pre-tensioned prefabricated beam according to Eurocode using the software Advance Design and IDEA StatiCa Beam.
- Concrete
- Reinforced concrete
- Tutorials
Structural design of a reinforced concrete beam (EN)
Read more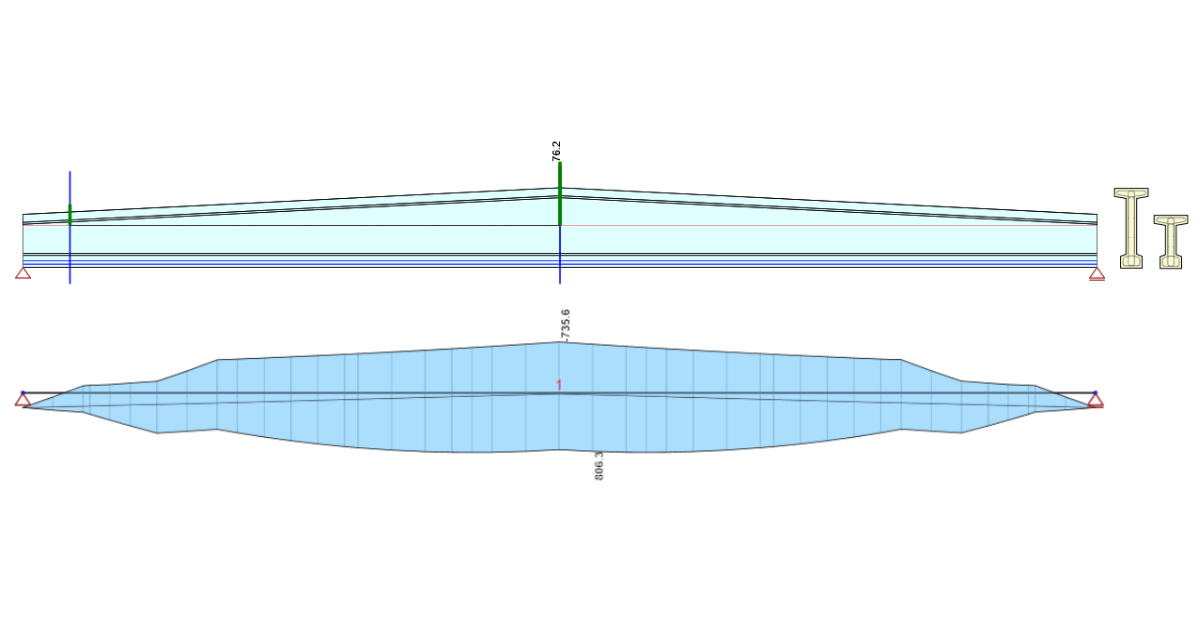
- Concrete
- Prestressed concrete
- Tutorials
Structural design of a prestressed concrete saddle beam (EN)
Read more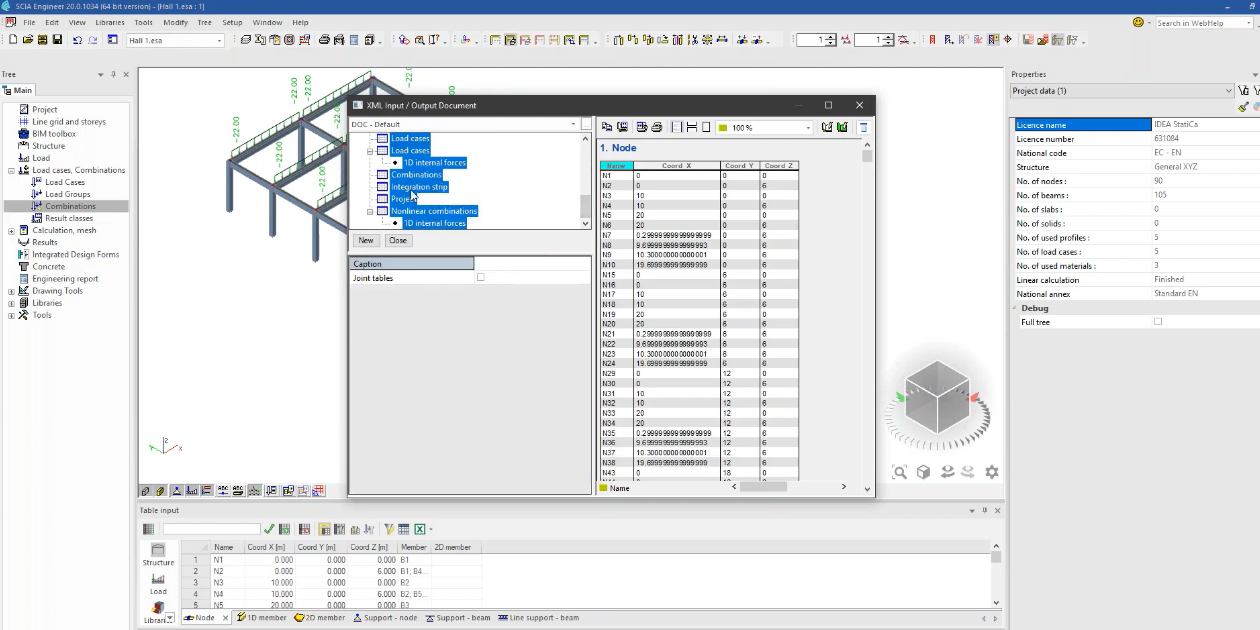
- Concrete
- Reinforced concrete
- Prestressed concrete
- Knowledge base
How to create XML file for IDEA StatiCa BIM app
Read more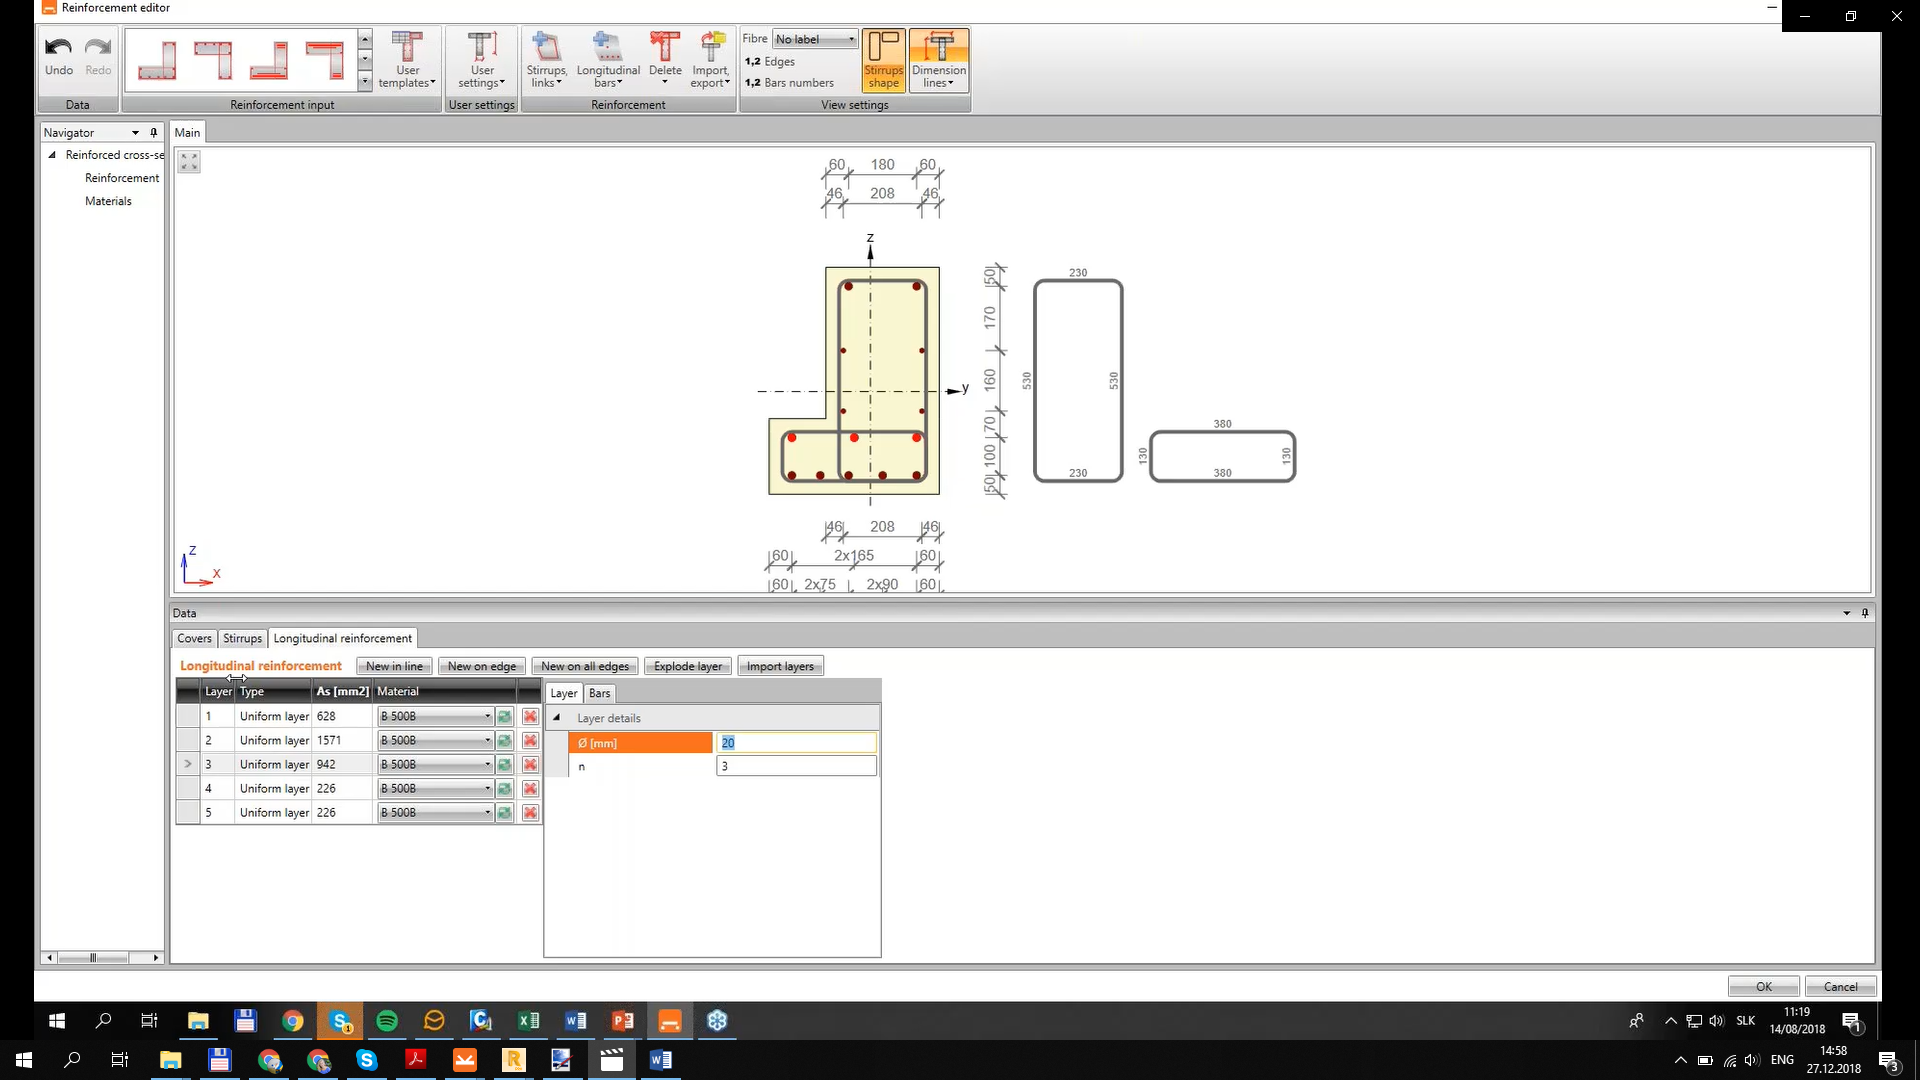
- Concrete
- Reinforced concrete
- Blog post