BIM link with RFEM 6 and RSTAB 9
The list of supported third-party applications was once more extended in patch 22.1.4, enabling RFEM 6 and RSTAB 9 to be a part of the standard Checkbot workflows within the IDEA StatiCa software package.
How to activate the BIM link with RFEM 6 and RSTAB 9
Download and install the latest version of IDEA StatiCa. Open IDEA StatiCa and navigate to the BIM tab and open the BIM link installer (Activate your BIM link...).
A notification "Do you want to allow this app to make changes to your device?" may appear. If so, please confirm with the Yes button.
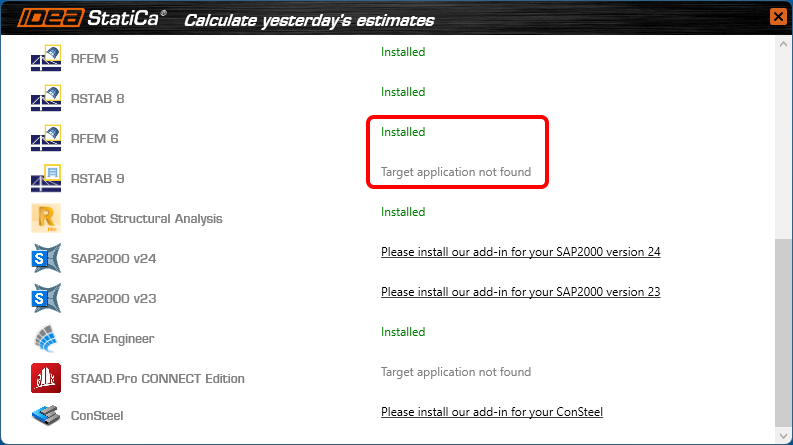
The BIM link for RFEM 6/RSTAB 9 is installed. The screen also tells you the status of other BIM links that are installed or may be installed later.
Open RFEM 6/RSTAB 9 and navigate to the menu Options and Program options. Here, scroll down and turn on the WebService feature to enable the data transfer of your RFEM 6/RSTAB 9 and other applications.
How to use Checkbot with RFEM 6 and RSTAB 9
Open an RFEM 6/RSTAB 9 project and run the calculation. To run the Checkbot, open the shortcut icon IdeaRFEMLink/IdeaRSTABLink, by default, located on your desktop (original file in path C:\Program Files\IDEA StatiCa\StatiCa 22.1\net6.0\IdeaRFEMLink.exe).
Checkbot for the current RFEM 6/RSTAB 9 project opens, and you can create a new project and start importing connections and members.
Limitations
- Missing a command directly in the application RFEM 6/RSTAB 9 instead of a desktop shortcut icon.
Waiting for Dlubal development to add the commands in their menu/interface. - Result combinations are not supported.
Waiting for Dlubal development to provide the necessary data provided in the API.
- Eccentricities specified relatively in RFEM 6/RSTAB 9 are not supported. Only absolute eccentricities can be imported.
Available in both Expert and Enhanced editions of IDEA StatiCa Steel.


